WeatherOrNot
A real-time temperature monitoring system using ESP32, MQTT, and a web application.
WeatherOrNot - Real-Time Temperature Monitoring System
WeatherOrNot is a comprehensive IoT project that utilizes an ESP32 microcontroller and a DHT11 sensor to provide real-time temperature data through an MQTT broker and a web application for visualization.
Feature Highlights
WeatherOrNot combines the power of microcontroller technology, MQTT protocol, and modern web development to deliver an efficient temperature monitoring system. It includes a user-friendly setup script and supports real-time data visualization.
Project Structure
The project is organized into multiple components to streamline development and deployment:
weather-or-not/
│
├── firmware/                 # All microcontroller-related code
│   ├── src/
│   │   ├── <something.ino>   # Main firmware
│   │
│   ├── lib/                  # External libraries
│
├── server/
│   ├── Dockerfile            # Dockerfile for server environment
│   ├── docker-compose.yml    # Docker compose file to manage services
│   └── app/
│       ├── mqtt/             # MQTT broker setup
│       └── database/         # Database scripts
│           ├── models/
│           └── migrations/
│
├── web-app/                  # Web application for end-users
│   ├── src/
│   │   ├── components/
│   │   ├── services/
│   │   └── hooks/
│   ├── index.html
│   ├── vite.config.js        # Vite configuration file
│   └── package.json          # NPM package file
│
└── scripts/                  # Utility scripts (testing scripts or deployment)
Page Layouts
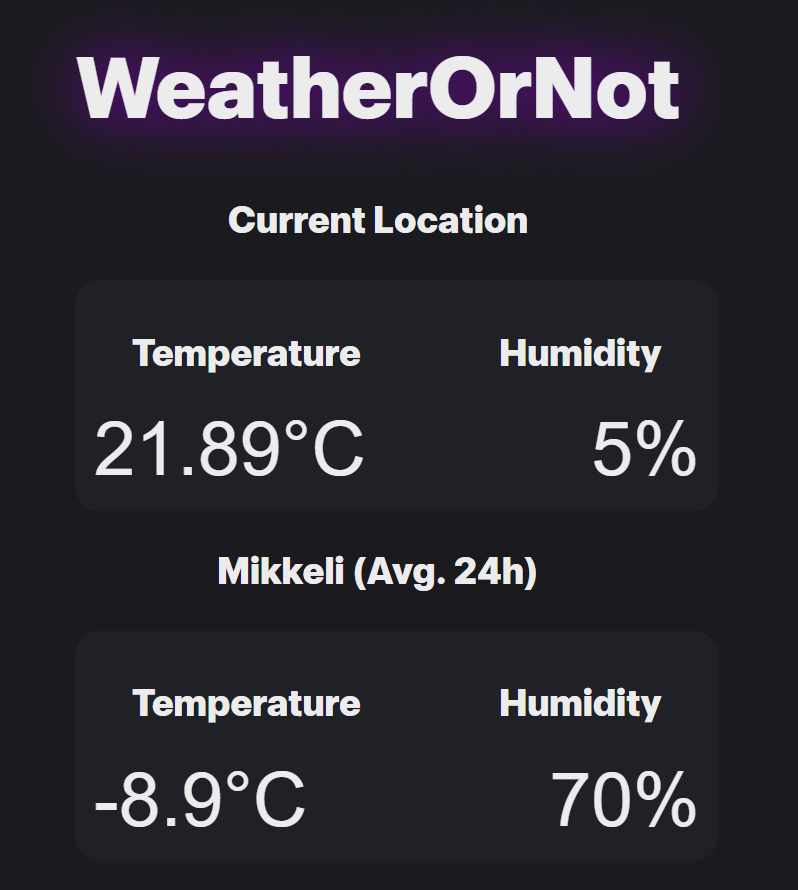
Main Interface View
Main Interface

Setup Instructions
Setting Up the MQTT Broker
- Navigate to the
serverdirectory. - Run
docker-compose up -dto start the Mosquitto MQTT broker.
Configuring the ESP32 (optional for testing)
- Open the Arduino IDE or PlatformIO.
- Load the provided firmware code for reading temperature data.
- Adjust the WiFi and MQTT server settings in the code to match your environment.
- Upload the firmware to the ESP32.
- Alternatively, simulate ESP32 measurements for testing with
./scripts/fake_arduino.sh.
Running the Web Application
- Navigate to the
web-appdirectory. - Run
npm installto install dependencies. - Start the server that subscribes to MQTT with
npm run start-server. - Start the application with
npm run dev. - For convenience, you can run the server and start the app concurrently using
npm start.
Script Usage
WeatherOrNot includes a bash script project-manager.sh to manage all components easily:
- Start Docker Compose Services:
./project-manager.sh start-docker-compose - Stop Docker Compose Services:
./project-manager.sh stop-docker-compose - Run Node Server:
./project-manager.sh run-node-server - Start Vite App:
./project-manager.sh run-vite-app - Run Fake Arduino Script:
./project-manager.sh run-fake-arduino - Enter Shell Mode:
./project-manager.sh shellfor interactive commands.
Conclusion and Reflection
Developing WeatherOrNot has been a fantastic experience, allowing me to dive deep into IoT technologies, MQTT protocols, and modern web development. This project is not only a testament to my technical skills but also to my ability to integrate various technologies into a cohesive, functional system.
For further insights and a detailed breakdown of the project, check out the project documentation:
Troubleshooting
- MQTT Broker Connection Issues: Ensure the MQTT broker is running and accessible. Check the IP address and port configurations in both the ESP32 firmware and the web application.
- Temperature Data Not Updating: Verify that the ESP32 is correctly connected to the WiFi and that the MQTT topic matches between the publisher (ESP32) and subscriber (web app).